Sloping A Floor Revit

Solved Bottom Sloped Floor Autodesk Community Revit Products

Solved Sloped Floor With Constant Soffit Autodesk Community Revit Products

Revit Architecture Creating Sloped Floors Bimscape

Sloped Floor Revit Tutorial Youtube

3 6 1 Creating A Sloping Floor Autodesk Revit Free Online Course

Shape Editing For Floors And Roofs Search Autodesk Knowledge Network
You can use this method to create a sloped surface on the following types of elements.
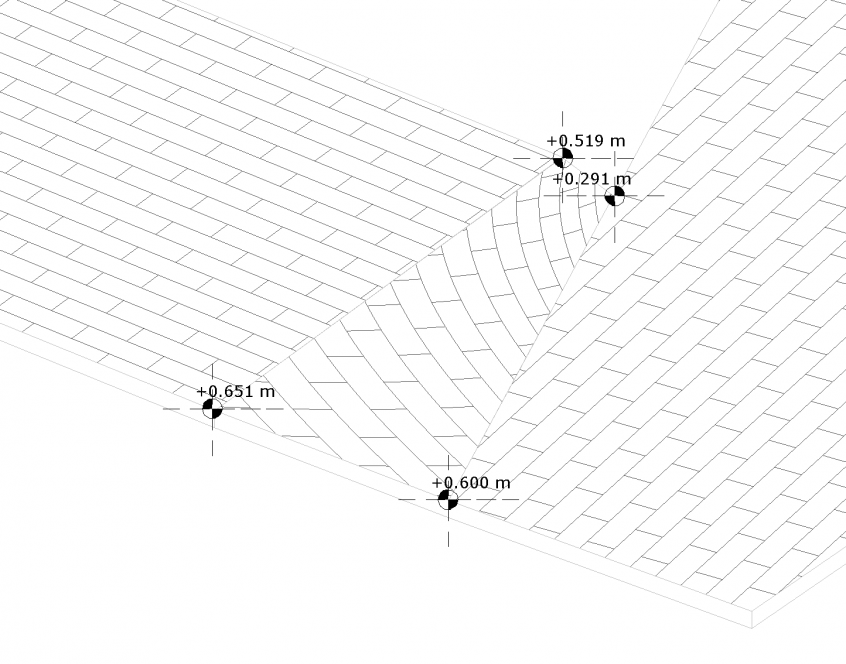
Sloping a floor revit. But now revit will only triangulate the area inside the split line boundary. If we switch to a 3d view we can clearly see the triangulated sloped section of our floor. In case you are not aware of this if you have an on grade sloping floor you can give your building pad a slope. Creating a building pad for your project is a great feature in revit.
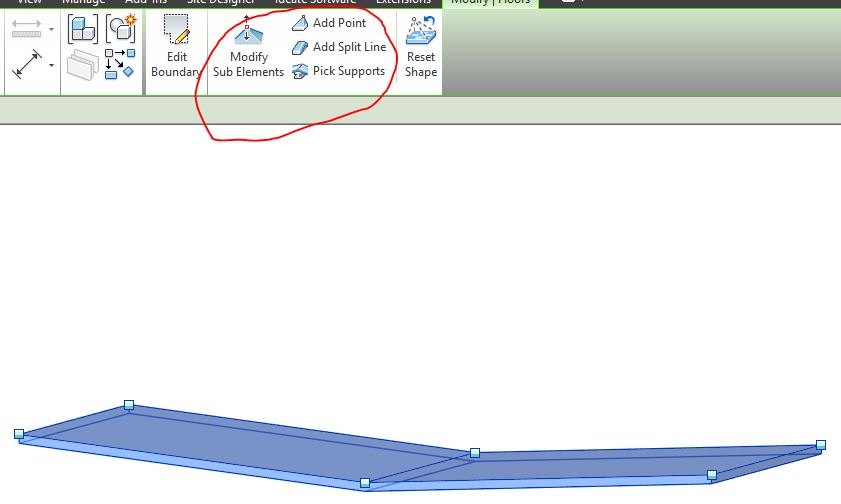
Specify a value for the offset from base property for parallel floor sketch lines. This is often the result of a curved face. Key points you can use shape editing tools to manipulate the surfaces of your floor elements. It did not show up in any of the beta s nor has it been mentioned in any of the marketing but it is one of the better enhancements to the program.
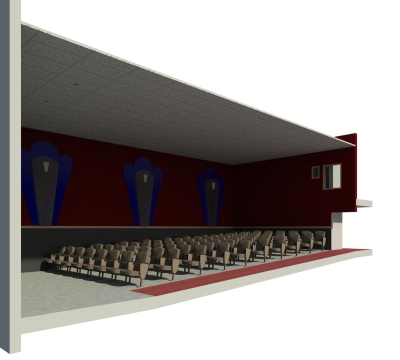
Normal manipulation of model patterns move align and rotatable will only apply for straight planes so to fix this unwanted deformation we need to manipulate surface by height. In sketch mode draw a slope arrow to create a sloped surface on an element such as a roof or floor. Working with hardscapes or sloped floors it sometimes happens that a model pattern will deform or behave strange in revit. You can create sloped floors in the building model.
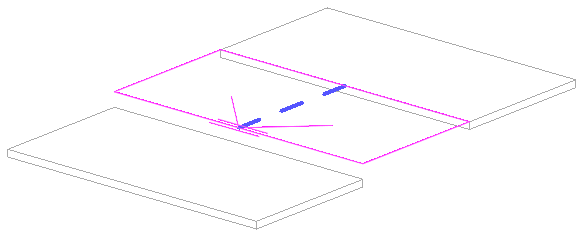
Roofs soffits floors structural floors ceilings building pads if you are not already in sketch mode select the element in a plan view and click modify. Draw a slope arrow while sketching or editing the floor boundary. Ummm but not all buildings are built flat. Use one of the following methods.
This could be say a walk in shower in the corner of a wet room. 1 select your pad.

Floors Revit Products Autodesk Knowledge Network

Terrace Floors Autodesk Community Revit Products

Sloped Floor Join Loses Materials Autodesk Community Revit Products

Solved Double Sloped Floor Autodesk Community Revit Products

Solved How To Create A Sloped Floor With Nice Round Edges Autodesk Community Revit Products
Revit Architecture 2013 Essential Creating Sloped Floor
Revitcity Com Revit 2018 Cut The Sloped Floor Where It Meets The Horizontal Floor

Solved Horizonzal Slope Joint Autodesk Community Revit Products
Create A Sloped Floor Revit Products 2020 Autodesk Knowledge Network
Sloped Surface Patterns In Revit Johan Hanegraaf

Solved How To Attach Floor To A Sloped Mass Surface Autodesk Community Revit Products
Sloped Roof Revit Dynamo

Cannot Create Parts For Roof In Revit Autodesk Community Revit Products

